執筆:EugeneAmnis
Inventory management using handy termial

This time we will create an inventory management system in Excel using the Forme series. As a rule, this inventory management system is implemented using only worksheet functions.
Book Inventory Management
Checks if the picked up book is registered in the master data, and records only the registered book quantity, storage time, storage area. Excel aggregates the recorded data and creates a system that displays a warning if the number of safety stock set for each book falls below.
(Book data for master data is assumed to already exist.)
Procedure
- Share forme.zip from Forme Pro (lite) to a PC
- Unzip form.zip and open FormeCollector.xlsm
- Create Forme Pro (lite) configuration data with FormeCollector.xlsm
- Copy 3 and QR code it with Forme QR Coder
- Load the QR code of 4. with Forme Pro (lite) and create a form
- After registering master data, input dummy data and send data to PC
- Create a database sheet based on the data of 6. in FormeCollector.xlsm
- Create dashboard sheet for database sheet
- Complete
Android devices and PCs share files via Bluetooth. (I will not explain here.)
Sharing via USB cable (external memory) is also possible.
The steps seem like a lot, but the actual work time is not much.
The image uses Japanese ones.
Steps 1 to 3
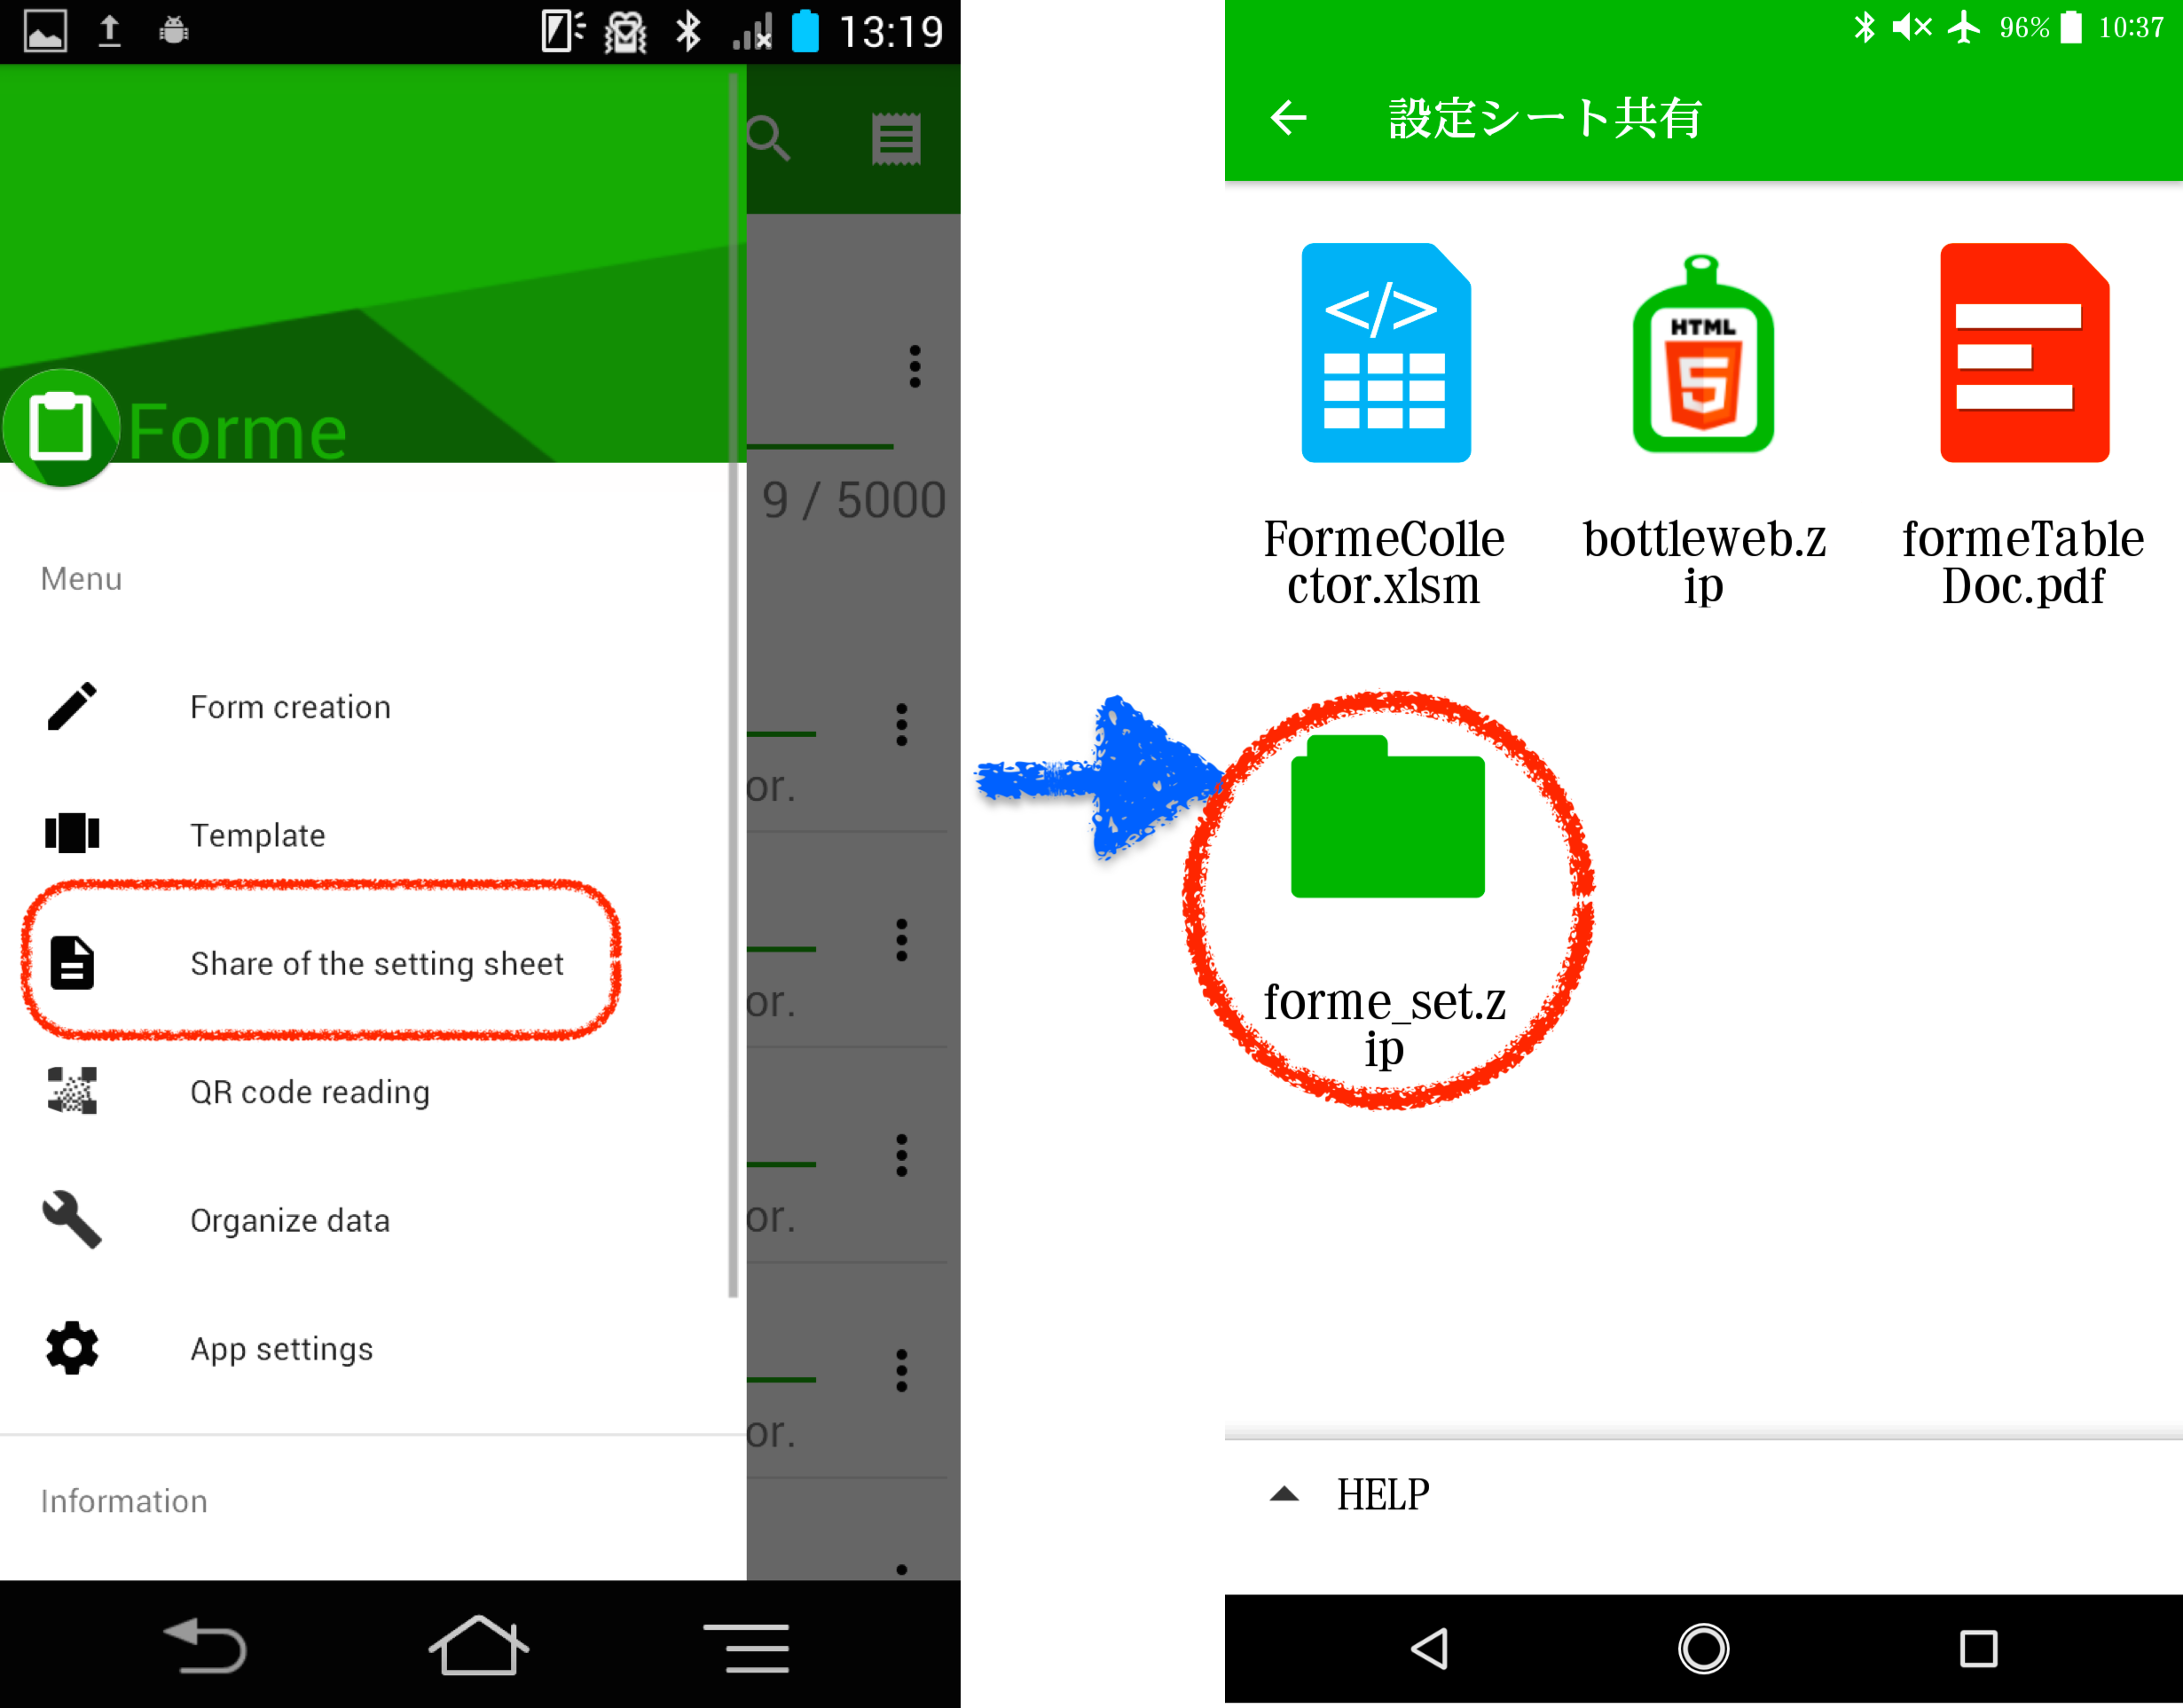
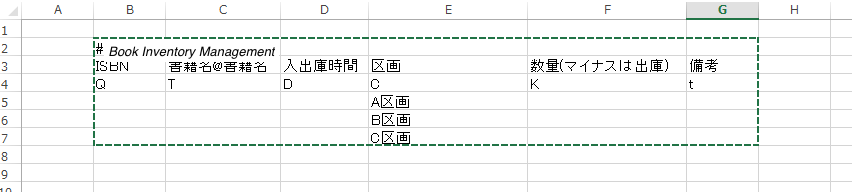
Main menu> Share setup sheet> forme.zip and send it to a PC. After decompressing the received forme.zip, create the following table on the sheet on FormeCollector.xlsm with macros activated. (The rules of the table are described in FormeTableDoc.pdf.)
#Book Inventory Management
| ISBN | Book Title | Date Time | Section | Quentity | Memo |
|---|---|---|---|---|---|
| Q | T | D | C | K | t |
| A Section | |||||
| B Section | |||||
| C Section |
Next, copy the created table on the FormeCollector.xlsm sheet.
Steps 4 to 6
Launch FormeQRCoder by clicking on formeQRcoder.html in forme.zip. Paste a table on Forme QR Coder and create a QR code.
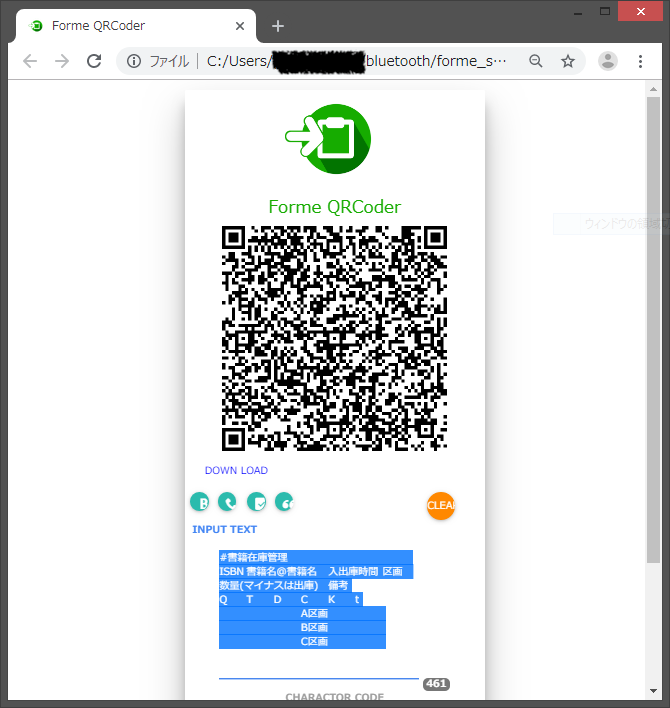
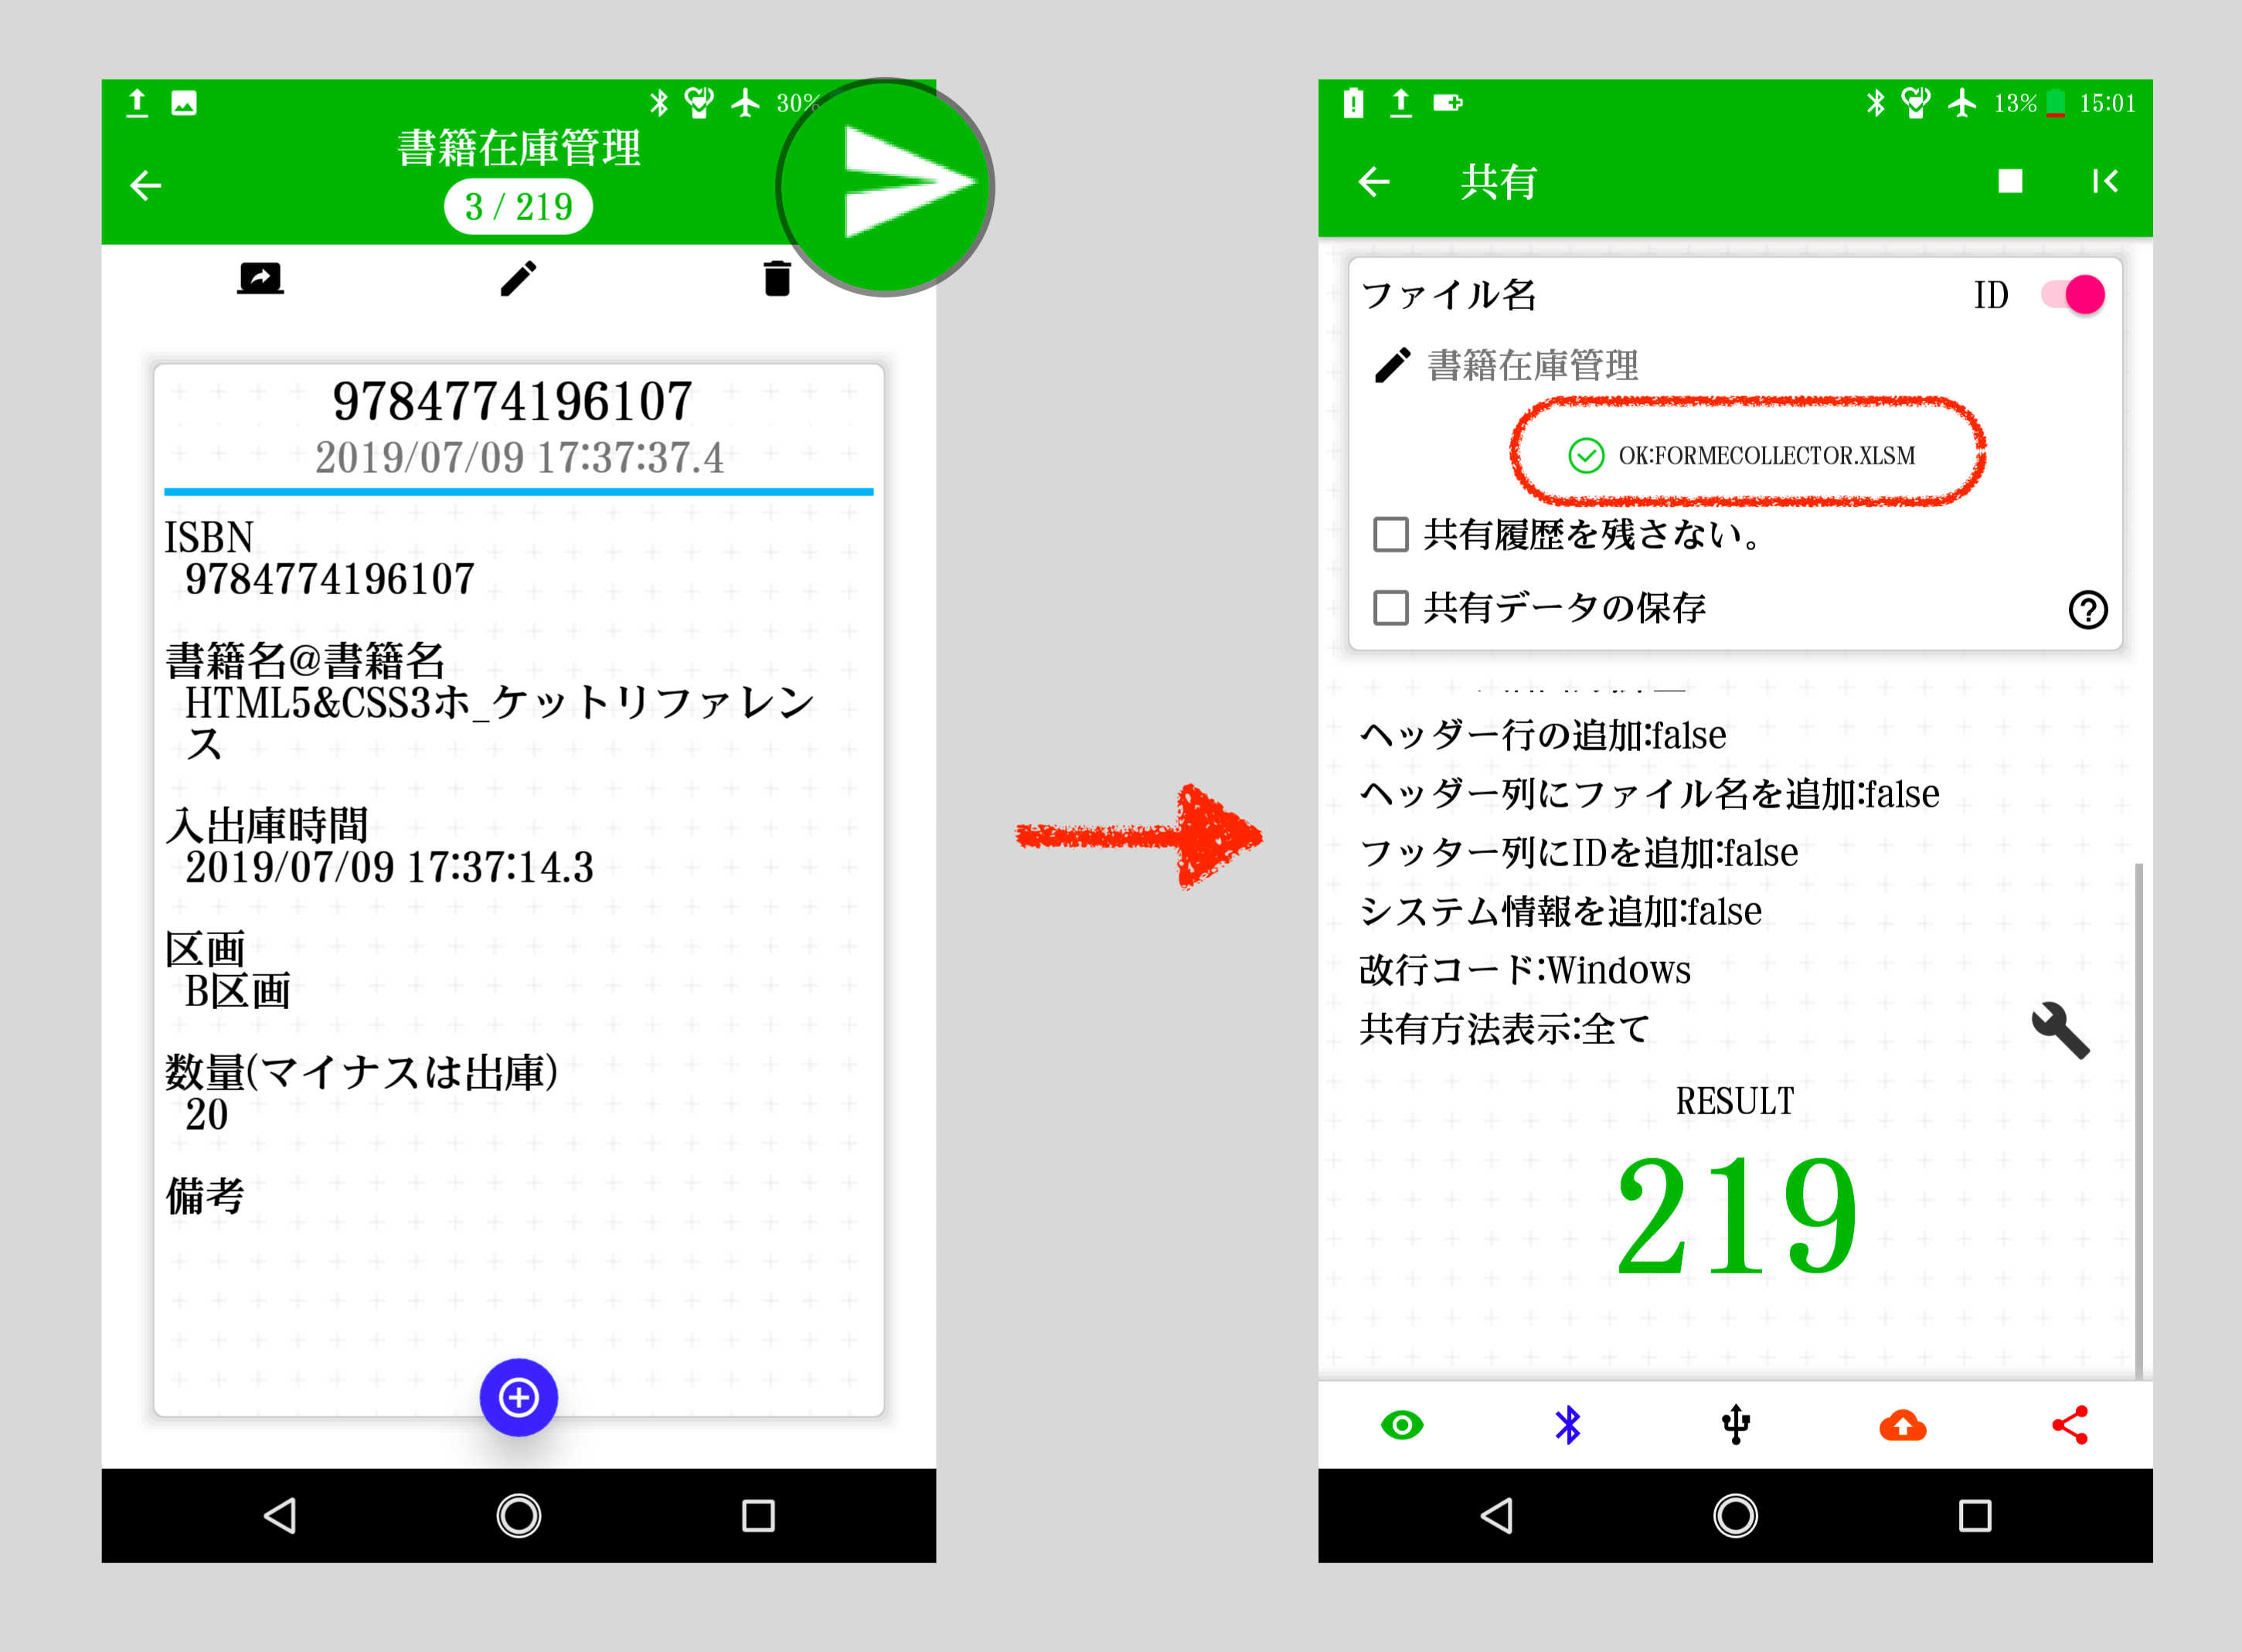
Android application QR code with Forme. Make sure that the form content is correct and create the form.

After registering the master data, input dummy data for the database sheet setting of FormeCollector.xlsm from the master data.
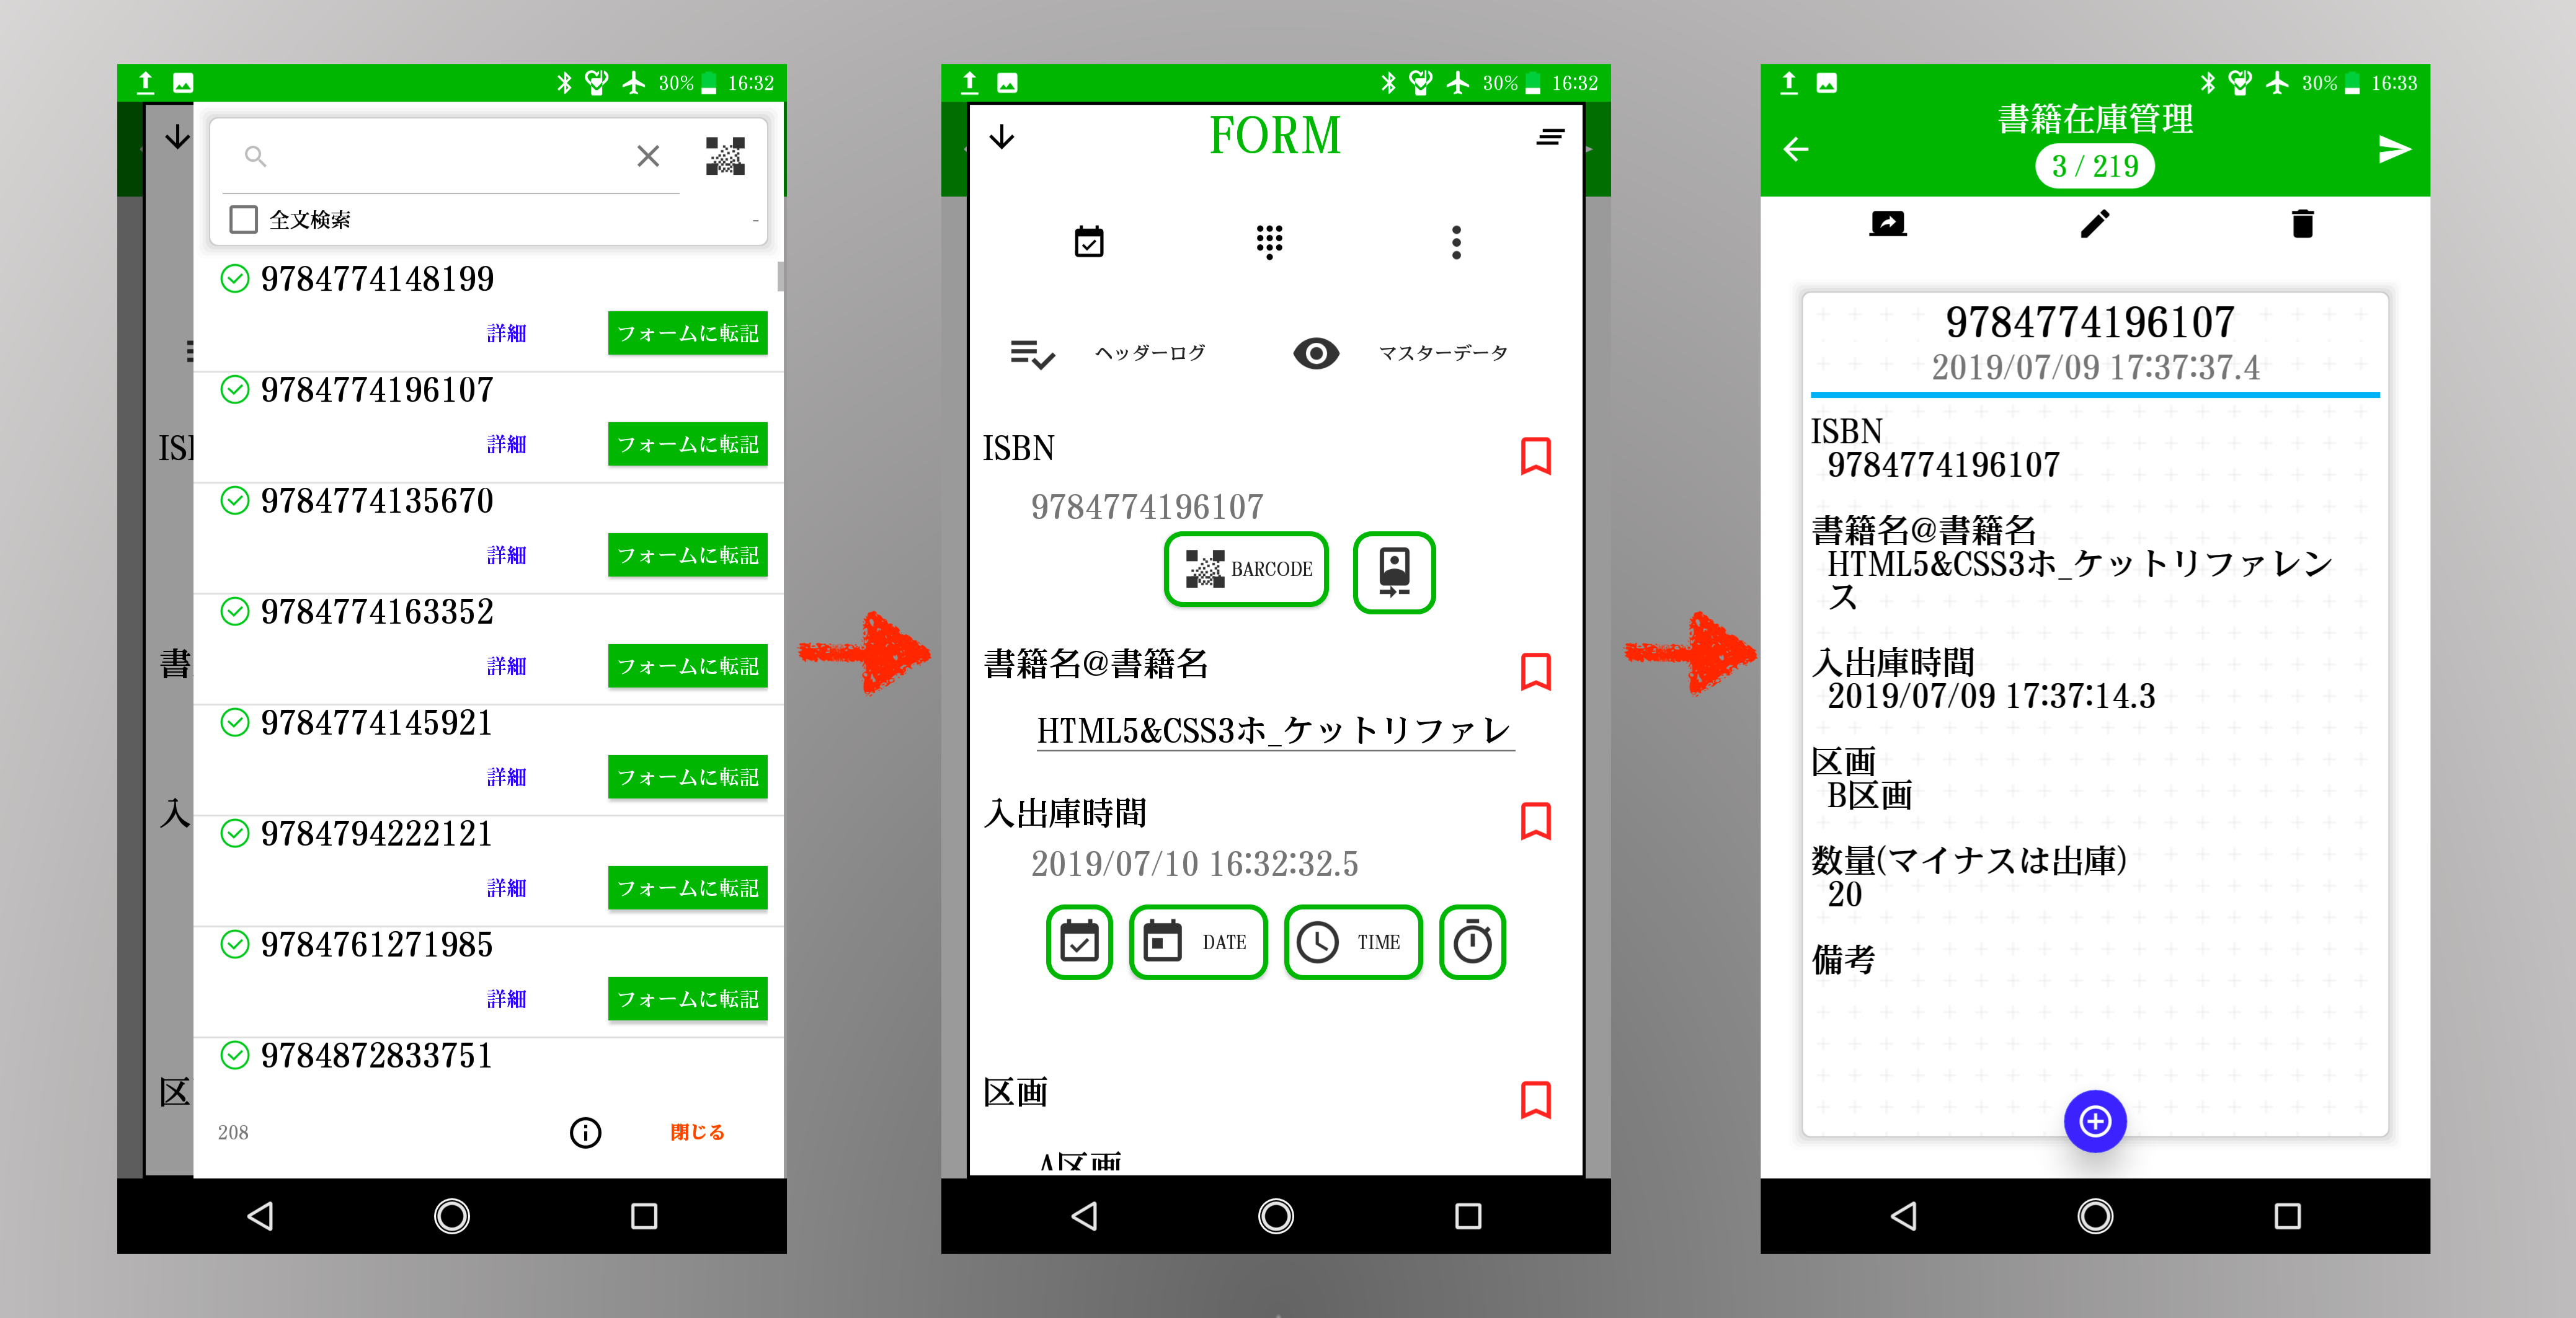
Send the input dummy data as CSV data to the PC. At this time, OK: Confirm that it is FORMECOLLECTOR.XLSM.
Steps 7 to 9
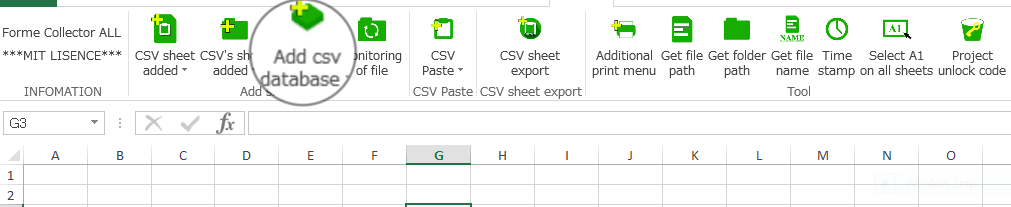
Create table for setting FormeCollector.xlsm > Forme tab > CSV database sheet Click Add and then click UTF-8. (When the character encoding of dummy data is UTF-8)
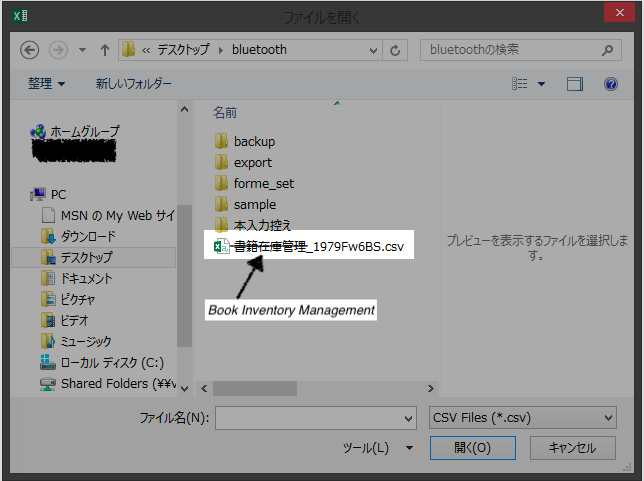
Select the received dummy data. (Import data from the folder where the dummy data was from next.)
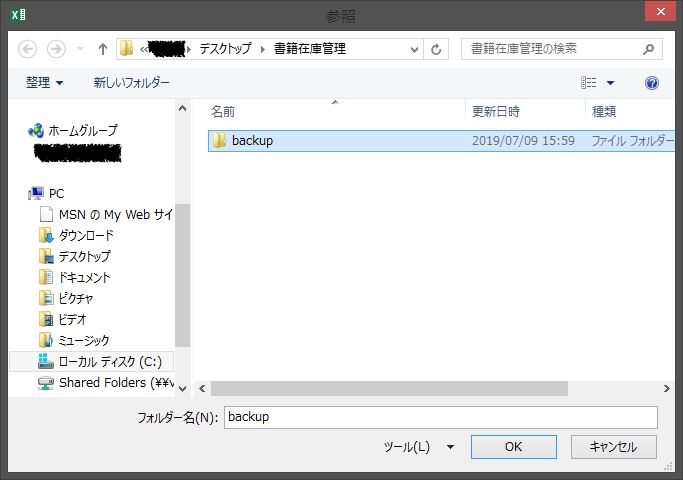
Next, select the folder to save the imported data.
Additional CSV database sheet To make it easy to see, move objects such as buttons and adjust the color and width of the table, and make items in the header row I will continue to enter. You can add more columns if it is the last column of the table.
| No | file Name | ISBN | Book Title | Date Time | Section | Quentity | Memo |
|---|---|---|---|---|---|---|---|
Next, change the name of the table object on the CSV database sheet > Formulas tab> Manage Names> Defined Names. Select one of the table object names from the dialog and click 2 Edit.
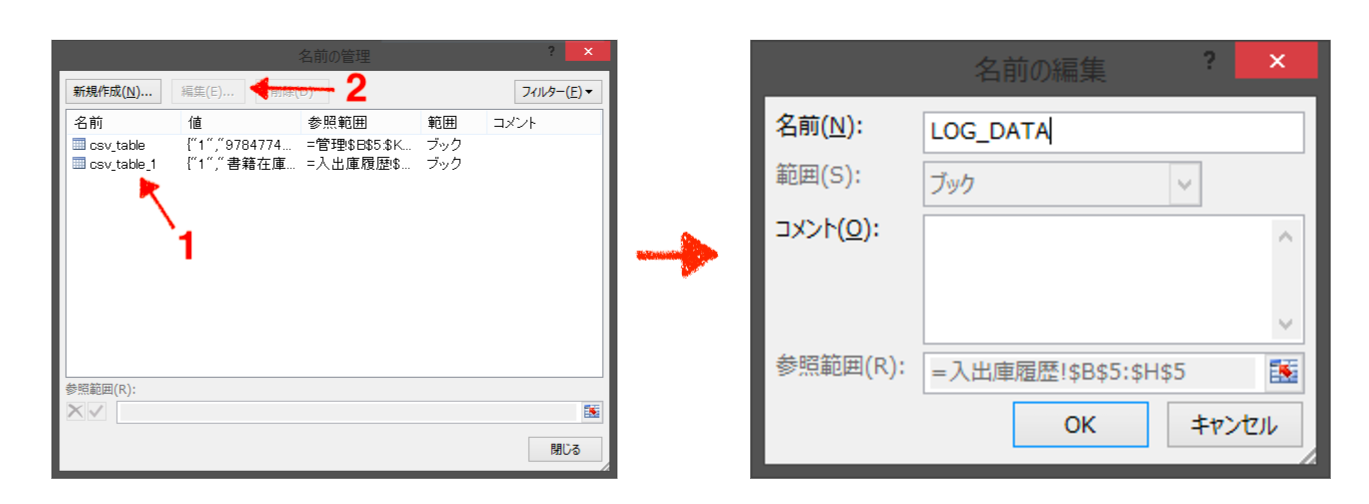
Change the name to LOG_DATA. It is easy to refer to by changing the name.
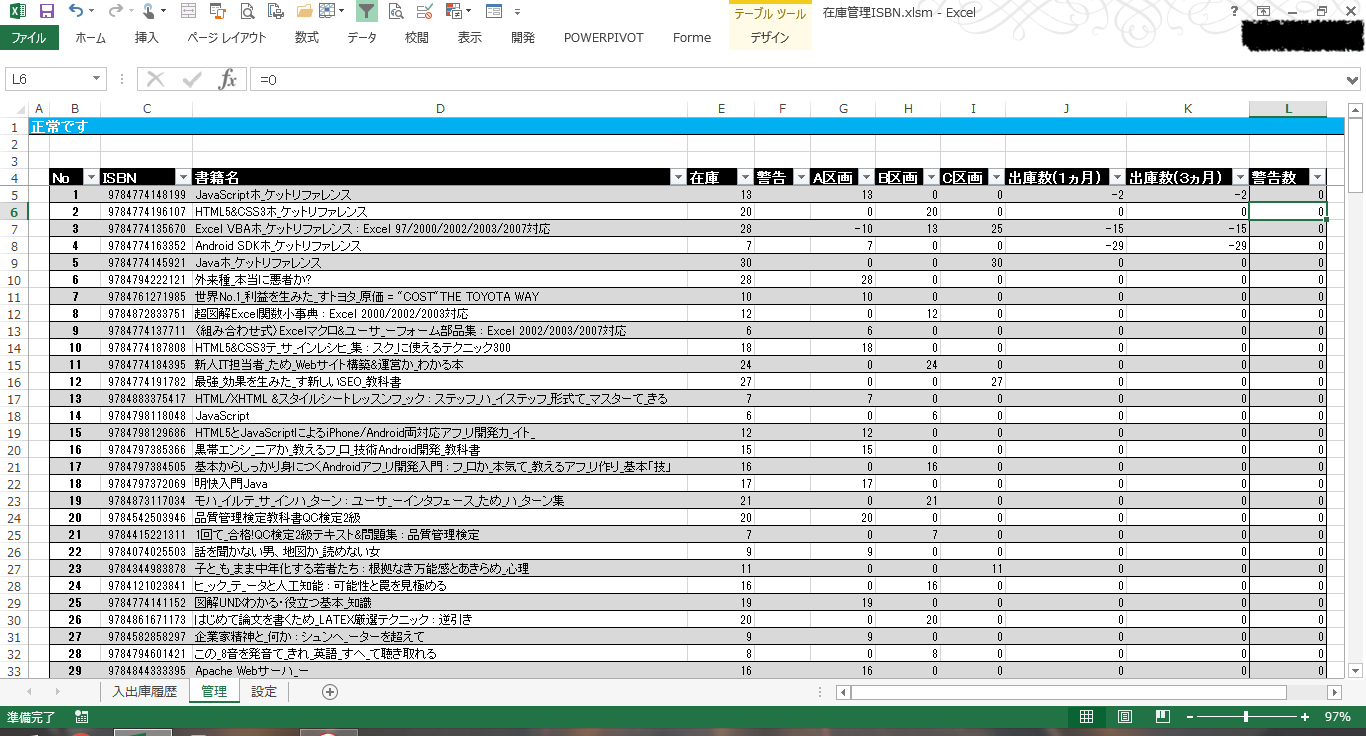
Next, after creating a new sheet, name it Manage. Insert a table object and enter a header row as shown in the following table.
| No | ISBN | Book Title | In Stock | Warning | A Section | B Section | C Section | Number of Goods Issued (1 Month) | Number of Goods Issue (3 Months) | Number of Warnings |
|---|---|---|---|---|---|---|---|---|---|---|
It as sumed that the is ISBN and book title already have original data and will be transferred from there. The number of warnings is an arbitrary number. Enter the following formula in the remaining columns.
No =ROW() - 4

In Stock =SUMIF(LOG_DATA[ISBN],[@ISBN],LOG_DATA[Quentity])

Warning =IF([@In Stock]<[@Number of Warnings],"Warning","")

A Section =SUMIFS(LOG_DATA[Quentity],LOG_DATA[ISBN],[@ISBN],LOG_DATA[Section],csv_table[[#Header],[A Section]])

B Section =SUMIFS(LOG_DATA[Quentity],LOG_DATA[ISBN],[@ISBN],LOG_DATA[Section],csv_table[[#Header],[B Section]])

C Section =SUMIFS(LOG_DATA[Quentity],LOG_DATA[ISBN],[@ISBN],LOG_DATA[Section],csv_table[[#Header],[C Section]])

Number of Goods Issued (1 Month) =SUMIFS(LOG_DATA[Quentity],LOG_DATA[ISBN],[@ISBN],LOG_DATA[Quentity],"<0",LOG_DATA[Date Time],">"&NOW()-30)

Number of Goods Issue (3 Months) =SUMIFS(LOG_DATA[Quentity],LOG_DATA[ISBN],[@ISBN],LOG_DATA[Quentity],"<0",LOG_DATA[Date Time],">"&NOW()-90)
Enter the following in the A1 cell to determine the overall situation.
=IF(COUNTIF(csv_table[In Stock],"<=0")>0,"Missing part-Missing part",IF(COUNTIF(csv_table[Warning],"=Warning")>0,"Warning-need to be refilled","Normal"))
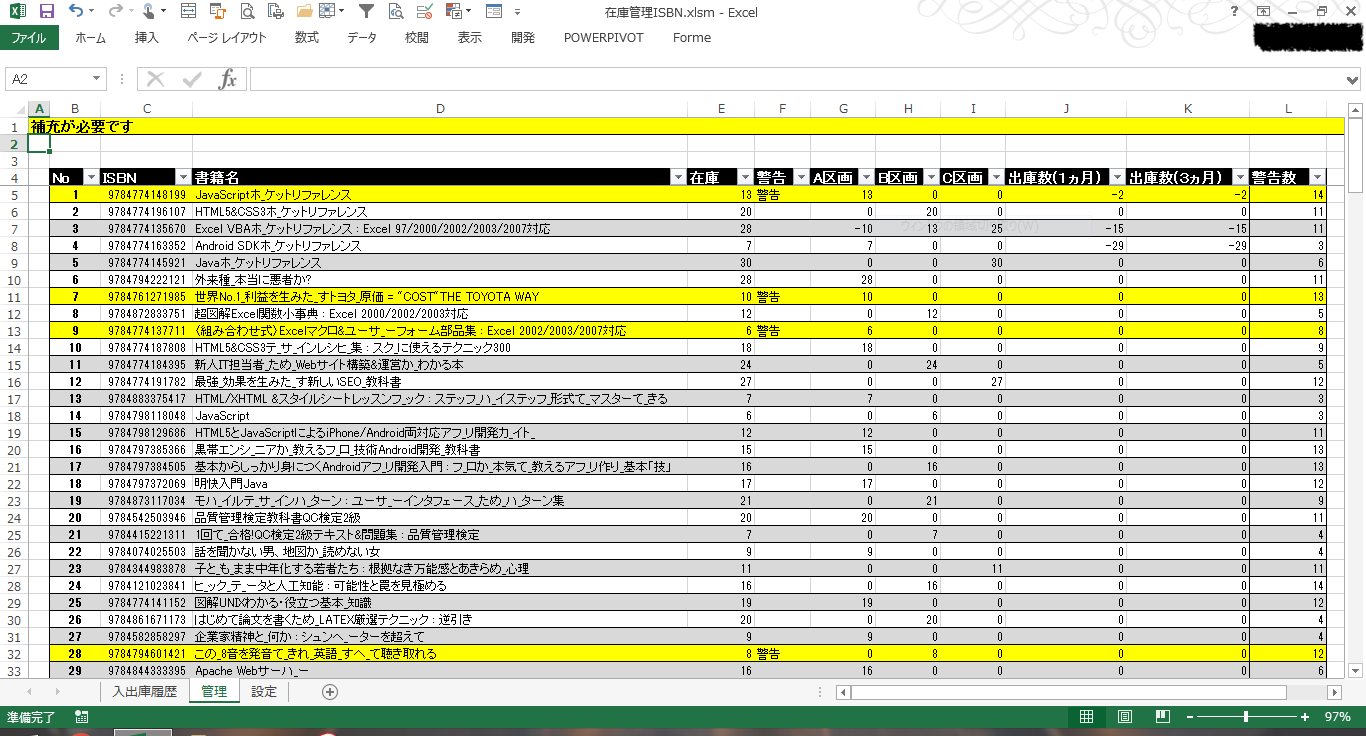
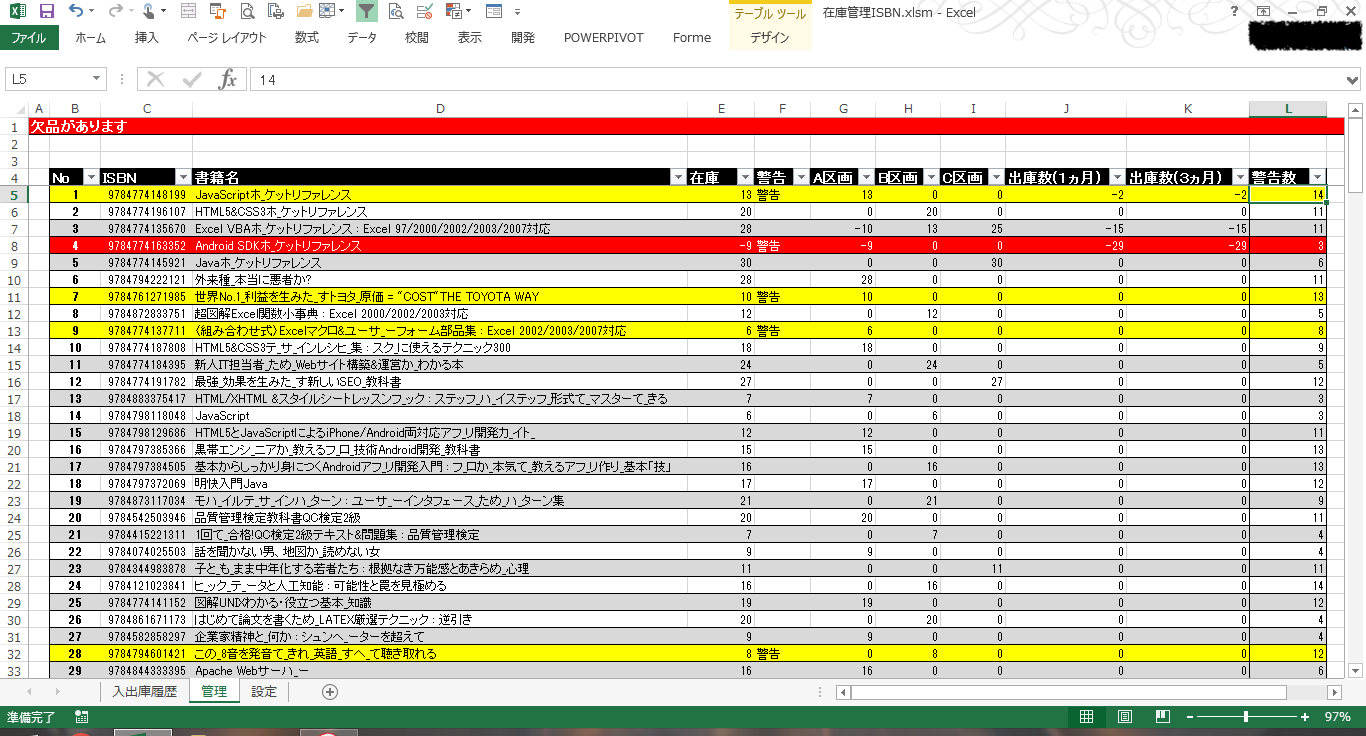
Completed with conditional formatting.
Operation
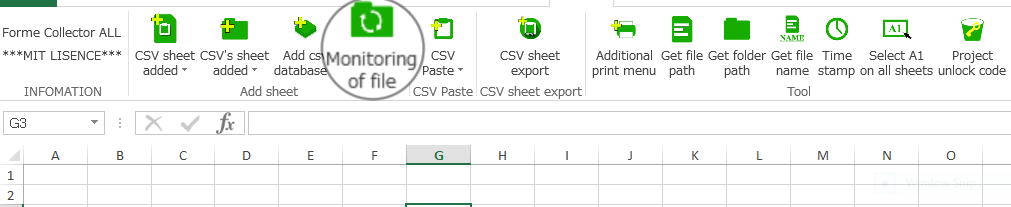
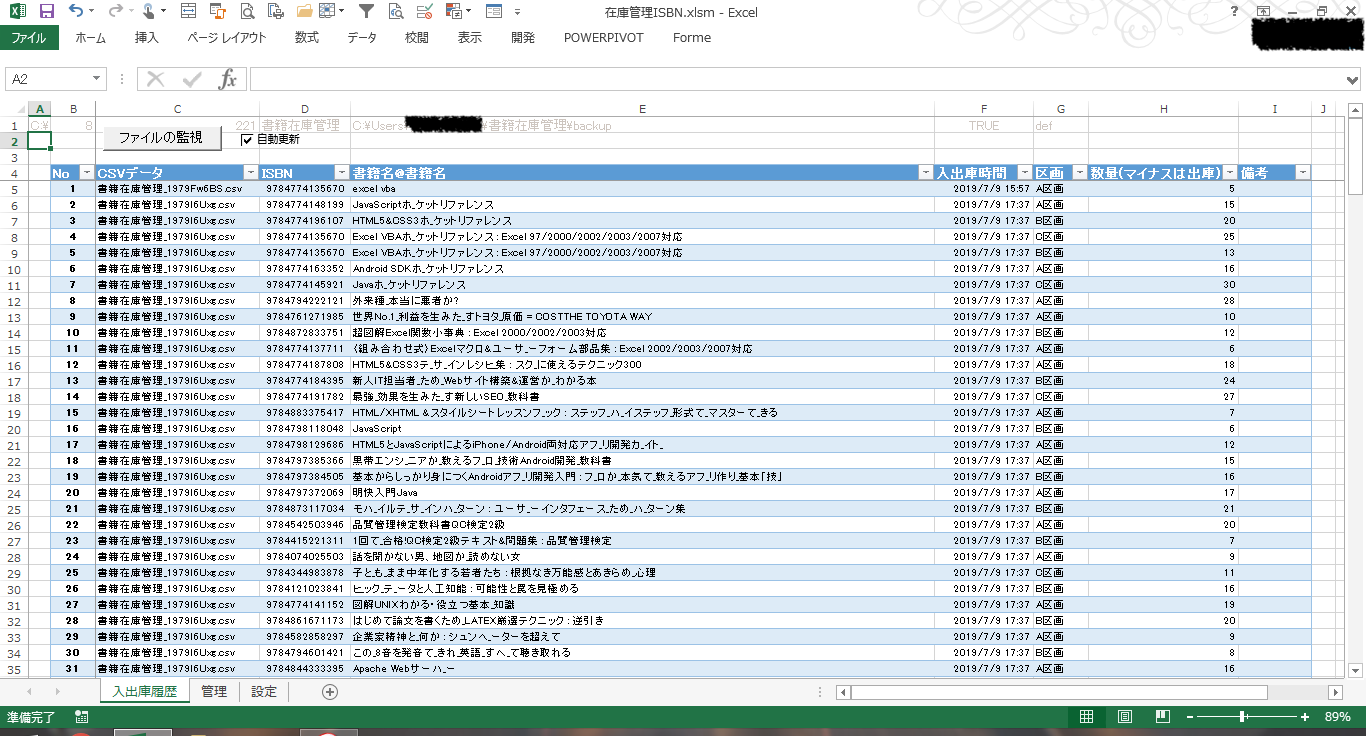
Android application Forme input data, put it in the specified import destination folder, and then Forme tab > Click File Monitoring to import data.
Normal
Warning-need to be refilled
Missing part-Missing part

You have created a minimal inventory management system with worksheet functions and conditional formatting.
With Forme, you can easily create an inventory management system using a handy terminal. Please try it by all means.